Schlieren optics cheat sheet
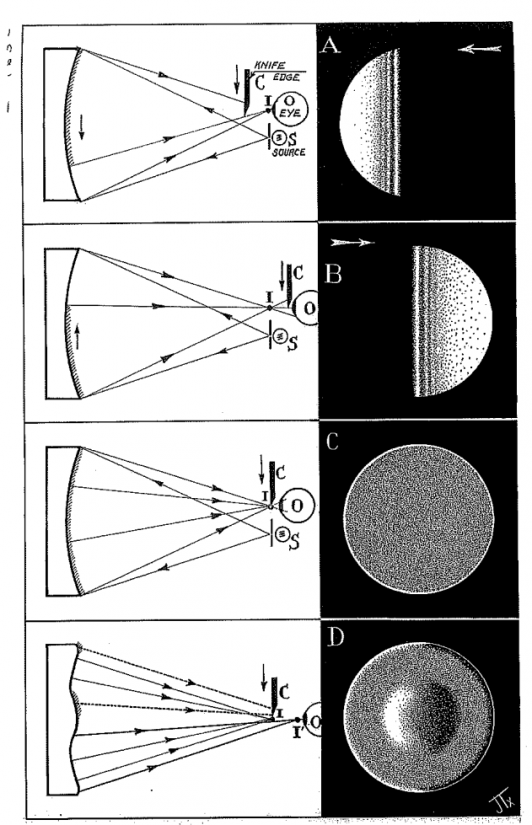
Shadowgraphy, Schlieren Optics, Test de Foucault are different designations for this optic experiment. Using a source of light, a concave miroir and a knife edge, it will allow you to see atmospheric refractions including infrared waves, gases etc. with your bare eyes. It has been technically described by the father of the optics of inhomogeneous media is the great enigmatic Robert Hooke (1635-1703) This unaided visual observation of schlieren effects, in which the pupil of the eye cuts off refracted rays, was not formally recognized as a schlieren technique for three centuries. However, it must have been observed by our curious ancestors even many centuries before Hooke. Hooke described this new field in his famous Micrographia Observation LVIII, which is a thorough and cogent discussion of light refraction due to density variations in the atmosphere and in liquids. With this background he explained a great many phenomena: the twinkling of stars, convection in fluids, "heat haze,"turbulent mixing and eddies, chromatic aberration, stratified flows, hydrostatics, and mirages. Even the modem field of gradient-index optics was presaged. Key among these observations was that of veins (streaks, striae, schlieren) in glass.
This rudimentary experiment needs some patience and some time for adjustments but once it is setup a world of the invisible opens up! Many of these experiments found on the web include a camera but in this case it is a totally analog version.
Elements
- Miroir primaire parabolique Kepler 203 mm F/4 BK7 Diamètre 203 mm, focale 800 mm - found in astronomy shops for telescope (around 230 eur) bigger = more exepnsive
- A table at least 180 cm long for setting up
- White LED + resistor (330 ohm /5volt)
- Sand paper
- Razor blade
- Black tape
- 3rd hands, clips, meter..
- Candle
- White sheet of paper
- Optional: camera for film
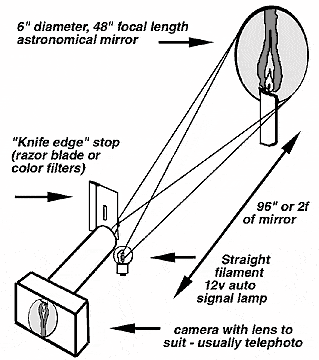
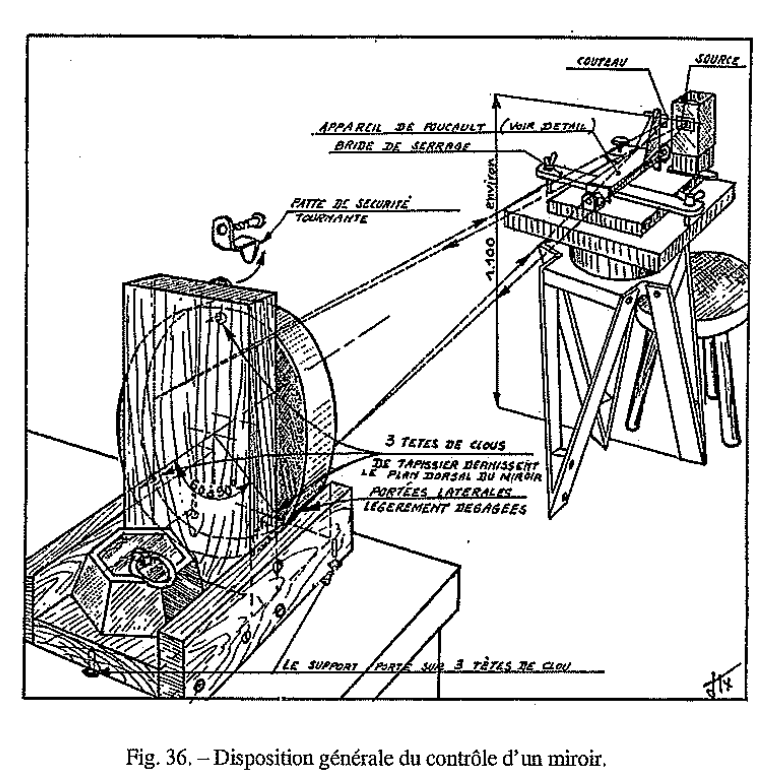
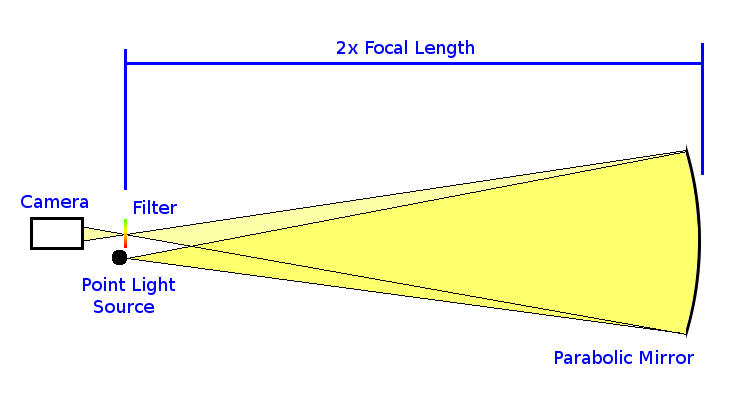
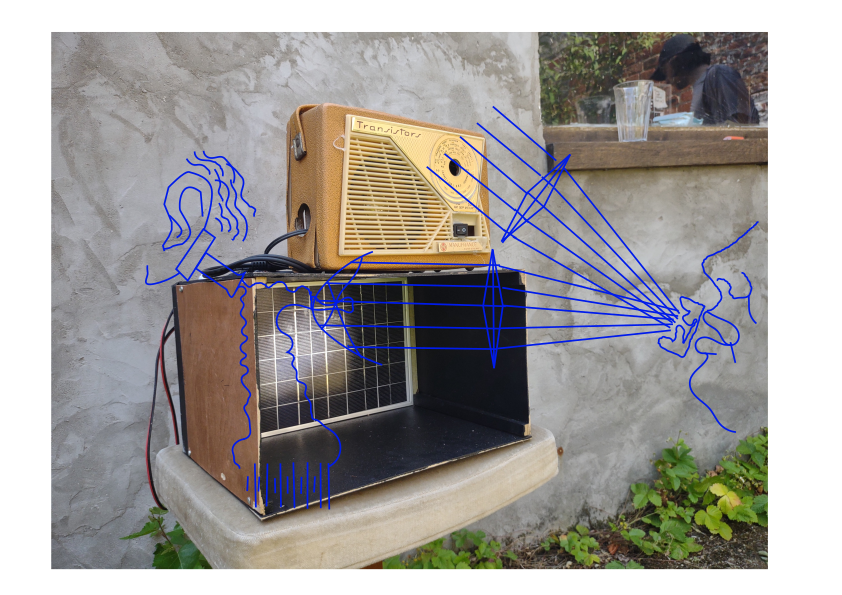
- (Depending on the size and focal length of your miroir) In my case: parabolic miroir 203 mm focale 800 mm. You must x2 your focal length so here 800x2 = 1600 mm.
- Sand the white LED and solder the resistor, in my case 330 ohm for 5 volt power supply
- After adjusting my focal point i mesured 1680 mm between the razor blade (used as the knife edge) and the parabolic miroir.
- Install the razor blade vertically with a 3rd hand clip at 1680 from the miroir facing the center of the miroir. The hight of the razor blade must be at the center of the miroir.
- Install the white LED with a 3rd hand clip near the razor blade at 1680 from the miroir pointing the center of the miroir. The hight of the LED must be at the center of the miroir.
- Take a white sheet of paper and find the small LED light spot reflected by the miroir, it should be near the razor, in the center of the miroir.
- Once you find it advance or go backwards the LED so that the point on the razor blade is clear as possible (not blurry!) The light point will be the same size as your LED
- Once you found your light point you need to take some black masking tape and make a small needle point hole to diminish the size of your light spot. Cover you LED with the needle point hole in the center pointing towards the center of the miroir. Find it near the razor balde and adjust if needed as in step 7. to get a clear light point.
- Put a candle on near and in front of the miror
- Now you can place your eye behind the razor blade so that you see the light point (a round white image that will actually be your miroir refelcting back)
- Move very delicatly the razor blade incline it a bit forward or backwards so you have black contrasts, you should see nice clear cloudy events coming out of the candle.
